
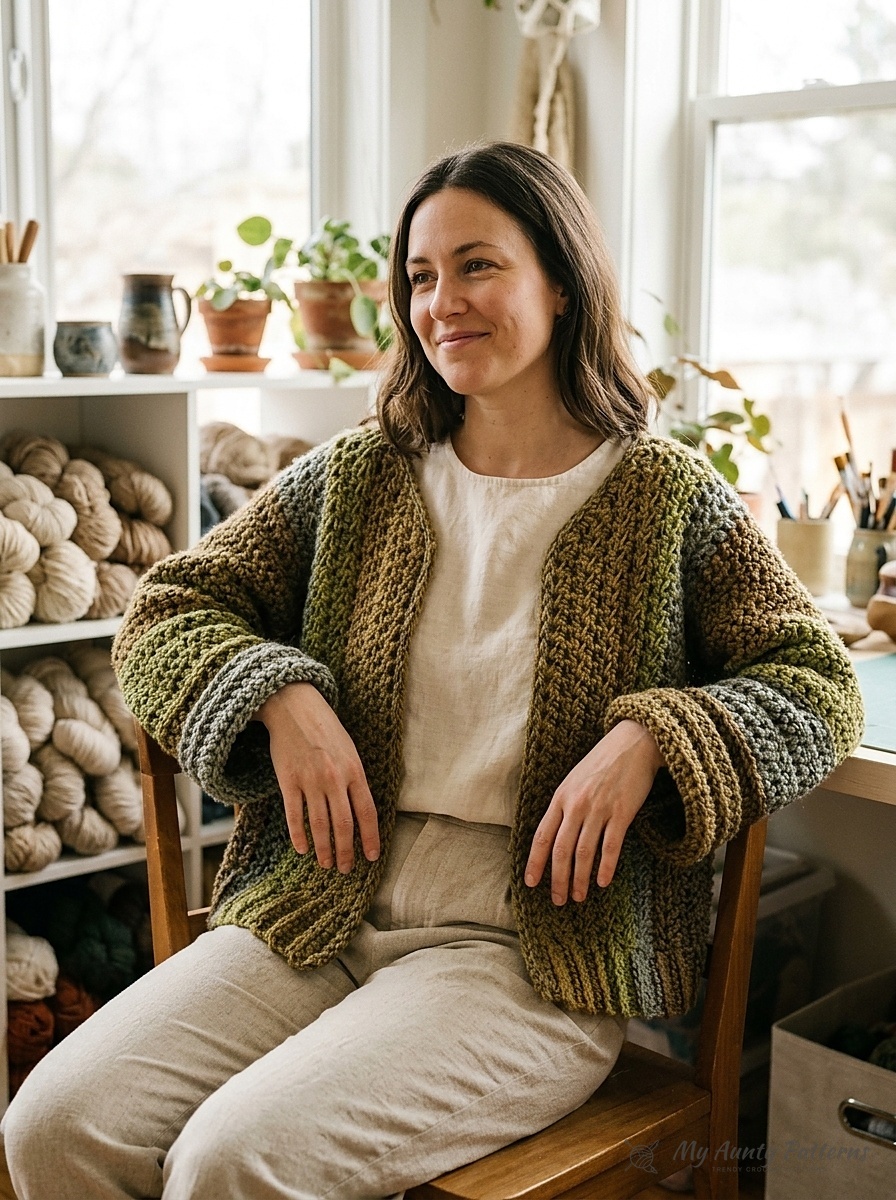
Self-striping super bulky yarn cakes shine brightest when your stitches run vertically down the body, creating flattering lengthwise color columns instead of horizontal bands. This free striped boxy half double crochet cardigan pattern is worked sideways in two symmetric halves—starting at each sleeve cuff with deep horizontal-bar ribbing, casting on chains for the front and back body panels with built-in ribbed bottom borders, and shaping a gentle V-neck slope before seaming down the center back.
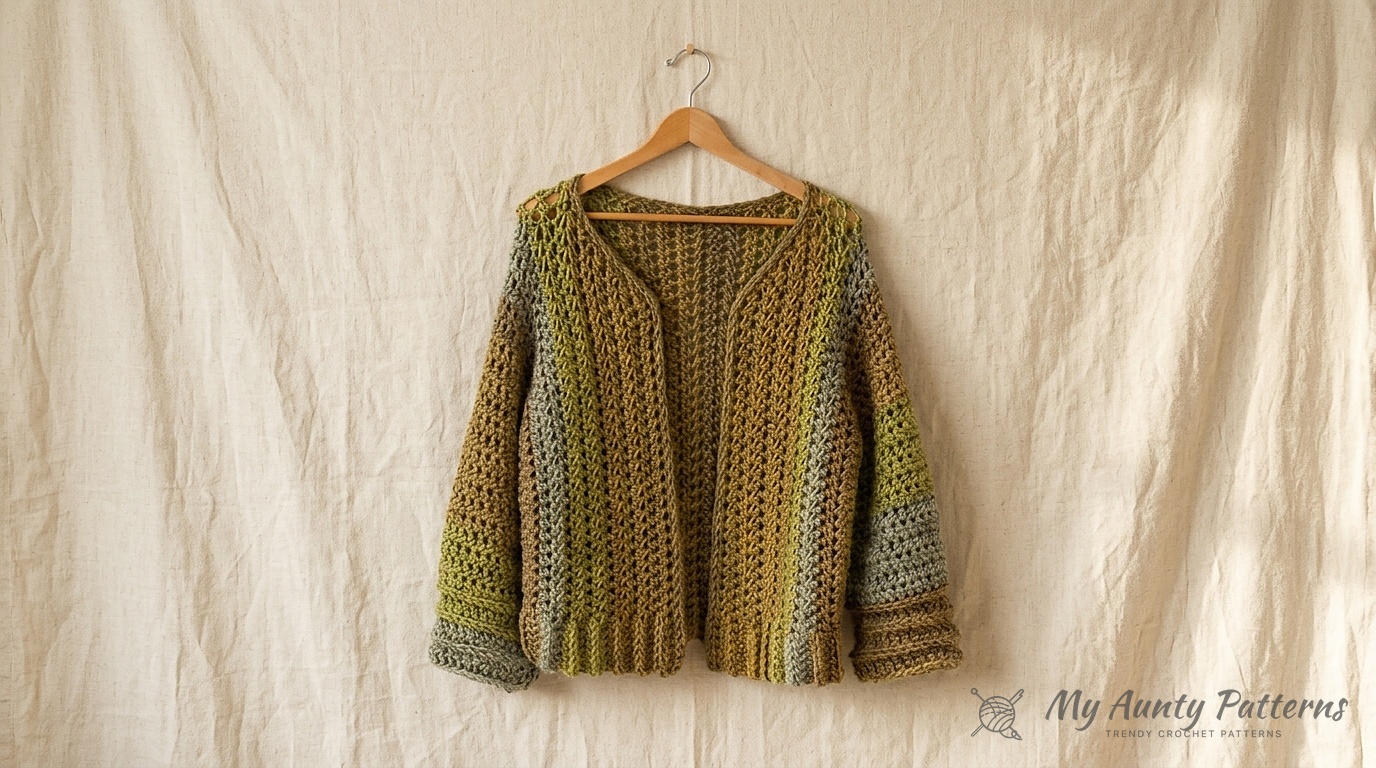
Pattern Terminology & Studio Notes: Written in standard US crochet terminology. Throughout this pattern, the beginning ch 2 at the start of every row does not count as a half double crochet (hdc) stitch—always work your first stitch into the very first stitch at the base of the turning chain.
How Cuff-to-Center Dolman Construction Builds Integrated Ribbing
Instead of crocheting a sweater body and picking up stitches later for cuffs and bottom ribbing, this pattern integrates all ribbing directly into your rows:
- Cuff-First Sleeve Start: Each half of the cardigan begins at the wrist with 8 rows of Horizontal-Bar Half Double Crochet (working into the third loop below the stitch on the previous row), creating a plush folded cuff before switching to standard
hdcup the sleeve. - One-Piece Body Cast-On: Once the sleeve measures 12″–14″, you chain 22–28 stitches on one side and 24–30 stitches on the other side, uniting the Front, Shoulder, and Back into one 74-to-96-stitch row!
- Built-In 6-Stitch Ribbed Bottom Hem: On every body row, the first 6 stitches and last 6 stitches (which sit at the bottom front hem and bottom back hem) are worked in Horizontal-Bar
hdc, automatically forming a 3-inch ribbed waistband as you crochet sideways!
Materials, Super Bulky Yarn Specs & 6-Size Garment Chart (XS to 5XL)
The featured sample is crocheted in Caron Tea Cakes (Category #6 Super Bulky, 80% acrylic / 20% wool; 8.5 oz / 240 g, 204 yds / 186 m per cake) in colorway Maple Matcha (20005) using a U.S. Size L/11 (8.0 mm) crochet hook.
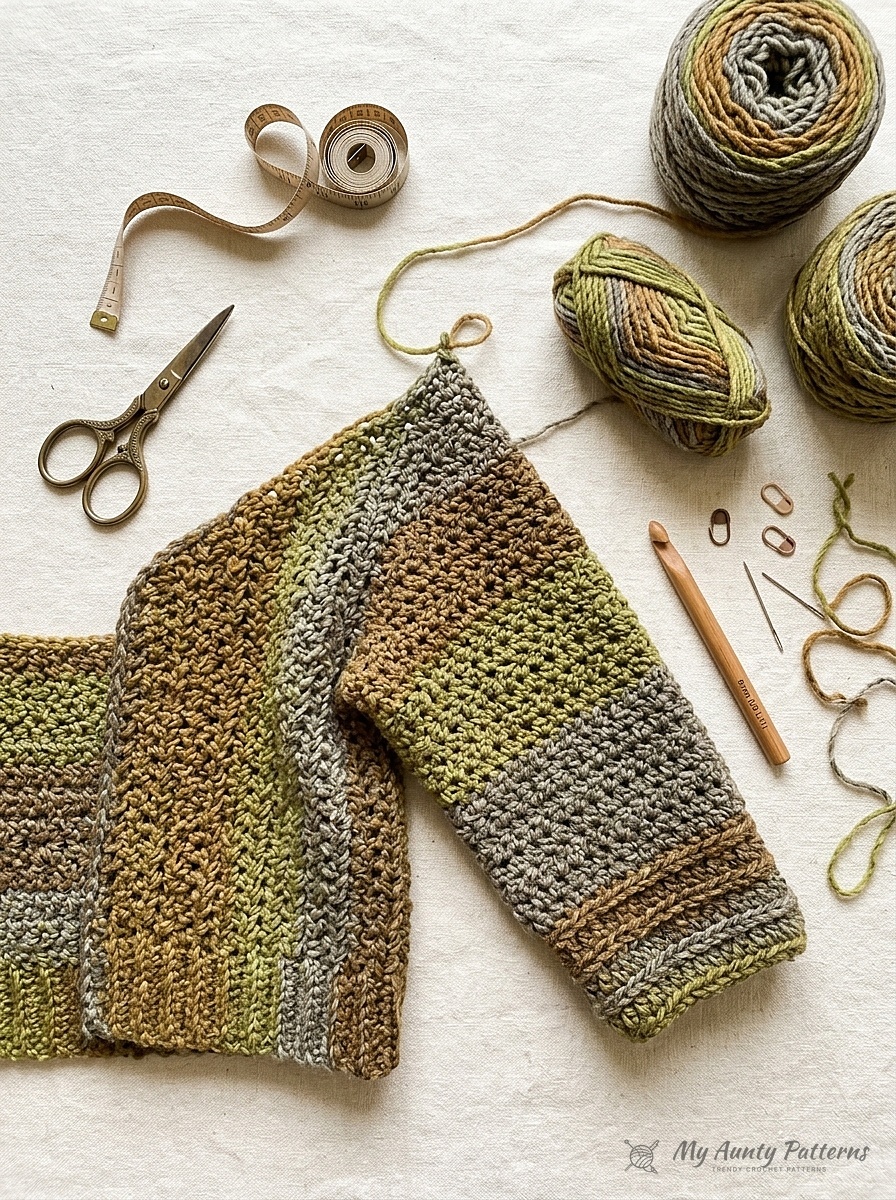
Materials & Tools Checklist
- Yarn: Caron Tea Cakes (Category #6 Super Bulky, 8.5 oz / 240 g; 204 yds / 186 m) in Maple Matcha (20005) — 3 (4 – 4 – 5 – 6 – 7) balls for sizes XS/S (M – L – XL – 2/3XL – 4/5XL).
- Crochet Hook: Size U.S. L/11 (8.0 mm) crochet hook, or size needed to obtain gauge.
- Notions: Large-eye yarn needle for flat center-back and underarm seams, locking stitch markers, and tape measure.
- Official Pattern Gauge: 7 stitches and 8 rows = 4 inches (10 cm) with an 8.0 mm hook.
Swipe left or right on mobile to view all 6 inclusive garment sizes (XS/S through 4/5XL).
| Garment Size | To Fit Bust | Finished Bust | Sleeve Cuff Chain (Hdc Count) | Full Body Row Stitches | Super Bulky Yardage |
|---|---|---|---|---|---|
| XS / S | 28 – 34 in. (71 – 86.5 cm) | 38 in. (96.5 cm) | Ch 32 (30 hdc) | 74 hdc | 612 yds (3 cakes) |
| Medium (M) | 36 – 38 in. (91.5 – 96.5 cm) | 42 in. (106.5 cm) | Ch 32 (30 hdc) | 74 hdc | 750 yds (4 cakes) |
| Large (L) | 40 – 42 in. (101.5 – 106.5 cm) | 46 in. (117 cm) | Ch 34 (32 hdc) | 80 hdc | 816 yds (4 cakes) |
| Extra-Large (XL) | 44 – 46 in. (112 – 117 cm) | 50 in. (127 cm) | Ch 36 (34 hdc) | 82 hdc | 980 yds (5 cakes) |
| 2XL / 3XL | 48 – 54 in. (122 – 137 cm) | 58 in. (147.5 cm) | Ch 38 (36 hdc) | 88 hdc | 1,180 yds (6 cakes) |
| 4XL / 5XL | 56 – 62 in. (142 – 157.5 cm) | 66 in. (167.5 cm) | Ch 42 (40 hdc) | 96 hdc | 1,390 yds (7 cakes) |
US Stitch Abbreviations
- Ch = Chain(s) — Ch 2 at beginning of row does not count as hdc.
- Hdc = Half double crochet
- Hdc2tog (Hdc 2 Together Decrease) = Yarn over and draw up a loop in each of the next 2 stitches; yarn over and draw through all loops on hook.
- Horizontal Bar Hdc = Work 1 hdc in the horizontal bar (third loop) created below the next stitch in the previous row.
- Sc = Single crochet
- Sl st = Slip stitch
Step-by-Step Cuff-to-Center Boxy Cardigan Instructions
Numbers in parentheses correspond to sizes XS/S (M – L – XL – 2/3XL – 4/5XL).
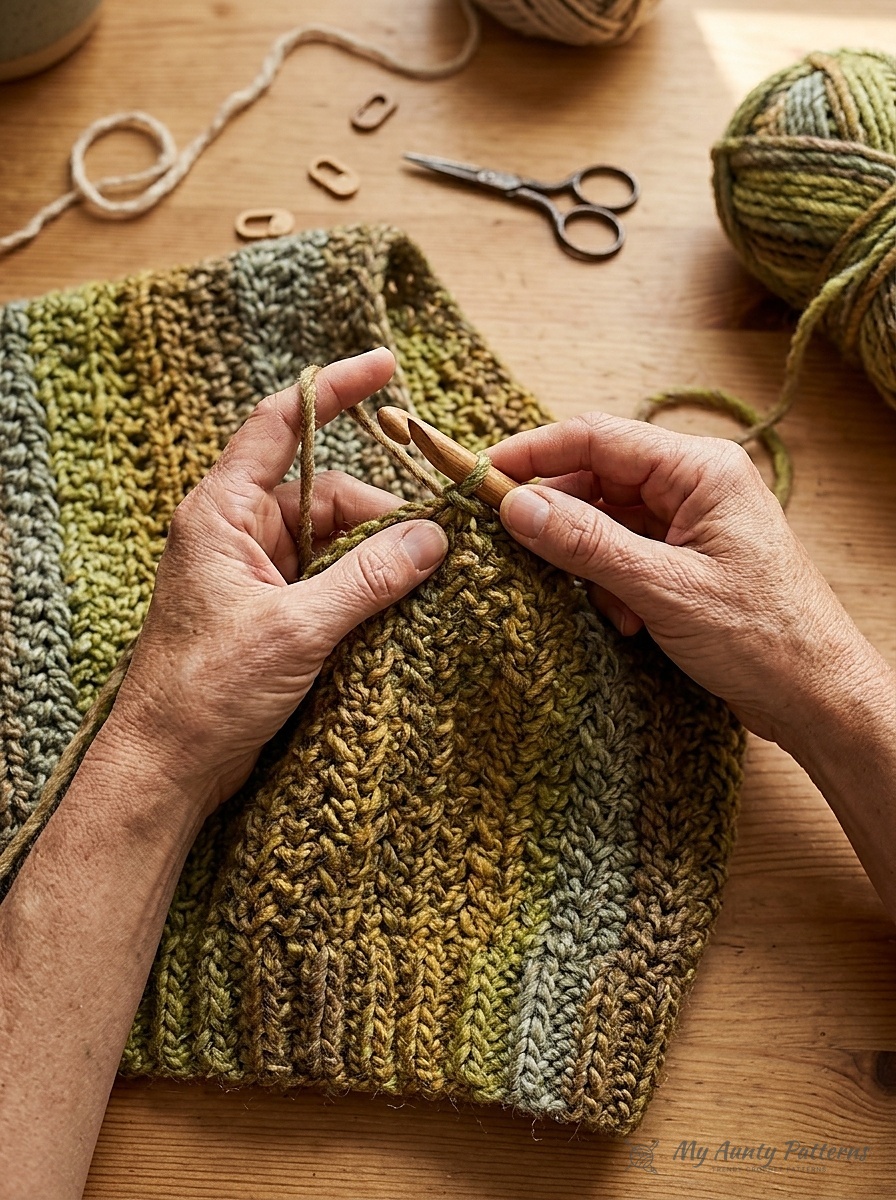
Stage 1: Right Side Half (Right Sleeve, Right Front & Right Back)
Right Sleeve Cuff: Beginning at the right wrist, chain 32 (32 – 34 – 36 – 38 – 42).
**Row 1 (RS): Work 1 hdc in the 3rd chain from hook and in each chain across. Turn. 30 (30 – 32 – 34 – 36 – 40) hdc.
Rows 2–8 (Ribbed Cuff): Chain 2. Work 1 hdc in the horizontal bar below each stitch across. Turn.
Main Sleeve Rows: Chain 2. Work 1 regular hdc in each hdc across. Turn. Repeat this row until the sleeve measures 12″ (12″ – 13″ – 13″ – 14″ – 14″) [30.5 (30.5 – 33 – 33 – 35.5 – 35.5) cm] from the cuff edge, ending on a Wrong Side row. Fasten off.**
Join Right Body (Row 1 – RS): Chain 22 (22 – 24 – 24 – 26 – 28), then work 1 hdc in each of the 30 (30 – 32 – 34 – 36 – 40) hdc of the Sleeve, then chain 24 (24 – 26 – 26 – 28 – 30). Turn.
Row 2 (WS): Work 1 hdc in the 3rd chain from hook and in each remaining chain and sleeve stitch across. Turn. 74 (74 – 80 – 82 – 88 – 96) hdc total.
Row 3 (Body Pattern with Ribbed Hems): Chain 2. Work 1 hdc in the horizontal bar of each of the first 6 hdc (bottom hem ribbing), then 1 regular hdc in each stitch across to the last 6 hdc, then 1 hdc in the horizontal bar of each of the last 6 hdc. Turn.
Repeat Row 3 until the Body from the Sleeve divide measures 6″ (7″ – 8″ – 8.5″ – 10.5″ – 12.5″) [15 (18 – 20.5 – 21.5 – 26.5 – 32) cm], ending on a Wrong Side row.
Divide for Right Back & Right Front:
- Right Back (Row 1): Chain 2. Work 1 horizontal-bar
hdcin each of the first 6 hdc, then 1 regularhdcin each of the next 31 (31 – 34 – 35 – 38 – 42) hdc. Turn, leaving the remaining stitches unworked for the Front. 37 (37 – 40 – 41 – 44 – 48) hdc. Continue working even over these Back stitches (keeping the 6 bottom-hem stitches in horizontal-bar ribbing) until the Back from the divide measures 3.5″ (3.5″ – 3.5″ – 4″ – 4″ – 4″) [9 (9 – 9 – 10 – 10 – 10) cm], ending on a WS row. Fasten off. - Right Front V-Neck Shaping: With RS facing, join yarn with a
sl stto the first unworked stitch at the center divide. Work 5 rows decreasing 1 stitch (`hdc2tog`) at the neck edge on every row while keeping the 6 bottom-hem stitches in horizontal-bar ribbing—reducing the stitch count to 32 (32 – 35 – 36 – 39 – 43) sts. Work even until the Right Front measures the same length as the Right Back from the divide, ending on a WS row. Fasten off.
Stage 2: Left Side Half & Finishing
Left Sleeve & Body: Chain 32 (32 – 34 – 36 – 38 – 42) and work from ** to ** exactly as given for the Right Sleeve, then complete the Body rows for 6″ (7″ – 8″ – 8.5″ – 10.5″ – 12.5″) to mirror the Right Side.
Divide for Left Front & Left Back: Work the Left Front first over the first 36 (36 – 39 – 40 – 43 – 47) sts (decreasing 1 stitch via `hdc2tog` at the neck edge for 5 rows down to 32 [32 – 35 – 36 – 39 – 43] sts and working to 3.5″–4″), then join yarn to the remaining 37 (37 – 40 – 41 – 44 – 48) Back stitches and work even for 3.5″–4″.
Assembly & Front Edging: Sew the Right Back and Left Back halves together along the center back using a flat seam. Sew the underarm sleeve and side seams continuously from cuff to bottom hem. Finally, with RS facing, join yarn at the bottom Right Front corner, chain 1, and work 1 row of single crochet (`sc`) evenly up the Right Front opening, around the back neck, and down the Left Front opening. Fasten off and weave in ends.
Mary’s Studio Tips for Self-Striping Yarn Cakes
- Start Both Sleeve Cuffs at the Same Color Transition: So your Left and Right sleeves feature matching stripe placement, pull a few yards from the center of your third or fourth cake so the Left Sleeve cuff begins on the same color shade as the Right Sleeve cuff.
- Clip a Stitch Marker at Stitch #6 From Both Ends of the Body: Marking the 6-stitch horizontal-bar hem boundary on both ends of the row lets you breeze through the plain middle `hdc` section without counting until you hit the marker!
Care & Washing
- Cool Hand Wash & Dry Flat: Because Caron Tea Cakes contains 20% wool, wash gently by hand in cool water and lay flat on a towel to dry.
Frequently Asked Questions
Why do we chain 22 on one side of the sleeve and chain 24 on the other side when joining the body?
On Row 2 of the Body, you work your first `hdc` into the 3rd chain from the hook (using up 2 of those 24 chains for turning height), which leaves 22 hdc on both the Front and Back extensions (`22 + 30 sleeve + 22 = 74 hdc`) so both halves of the body are 100% symmetrical!
READER COMMENTS & PATTERN QUESTIONS
Have a question about stitch counts, yarn substitutions, or sizing? Leave a comment below — Mary Ward reads and replies to every maker question!