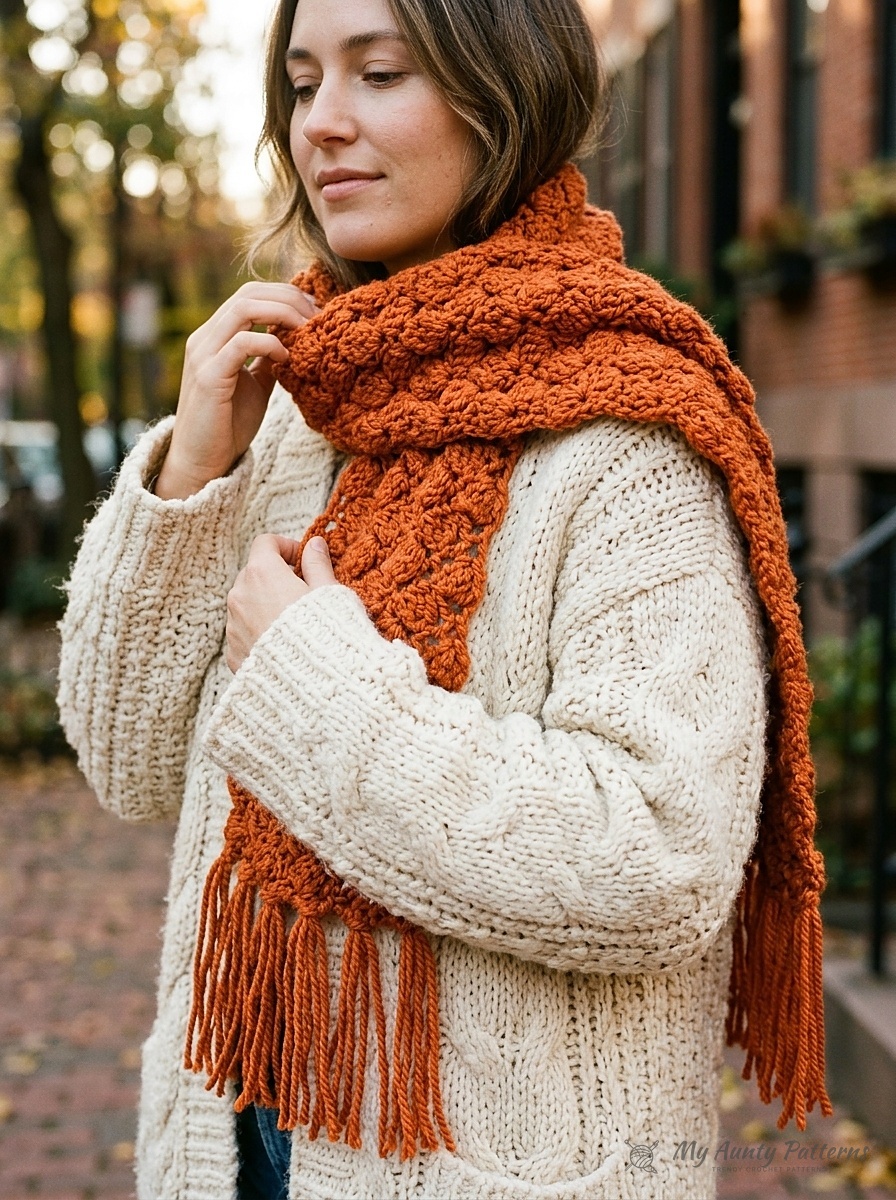
When chilly weather calls for a quick, deeply textured neck wrap, nothing satisfies faster than pairing Category #6 super bulky yarn with a rhythmic two-row cluster stitch repeat. This free super bulky textured cluster crochet scarf pattern pairs compact single crochets with plump 3-double-crochet clusters that pop out in pebble-like relief on the surface of the fabric. Finished with generous hand-knotted fringe tassels, the classic 7 by 64 inch scarf works up in a single afternoon using just two 150-gram balls of yarn.
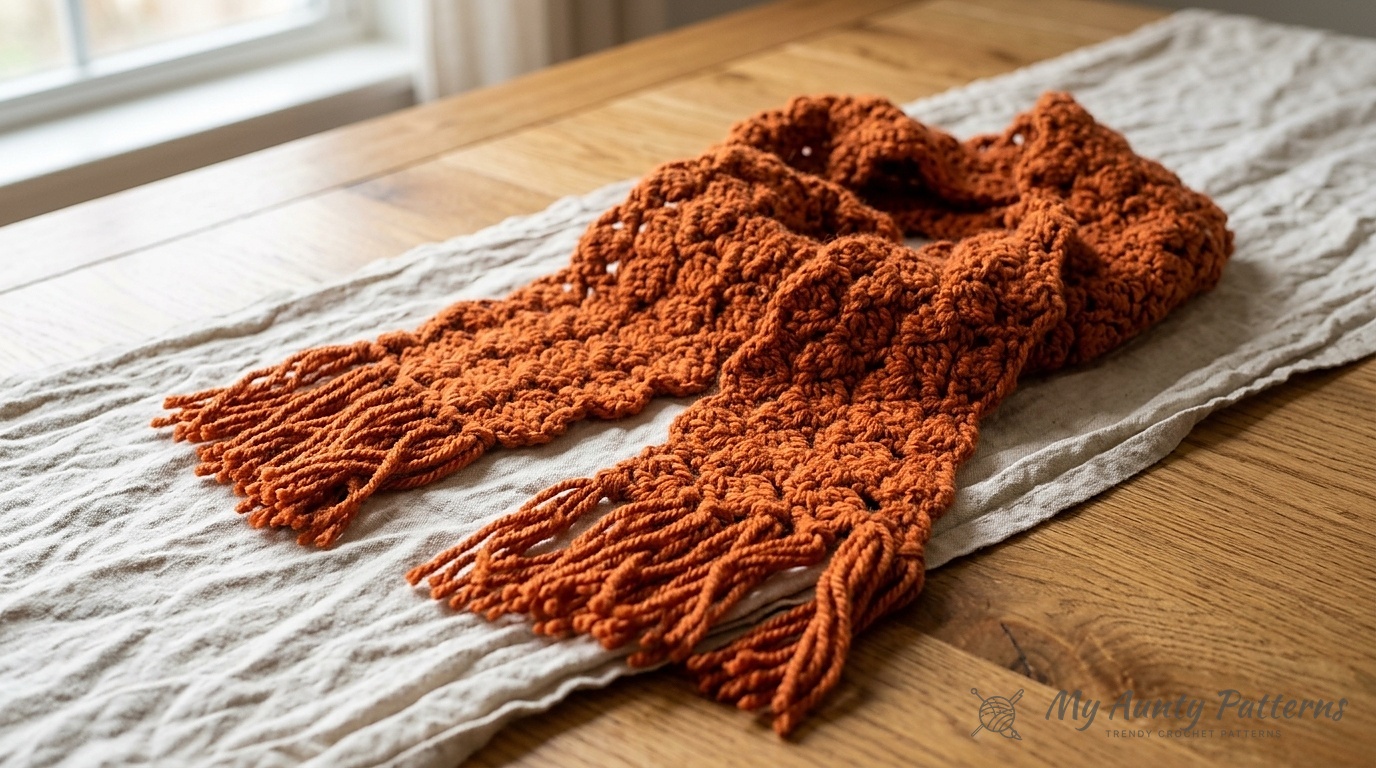
Pattern Terminology & Studio Notes: All instructions use standard US crochet terminology. This scarf is worked lengthwise in rows over an odd number of stitches (a foundation chain multiple of 2 chains). Notice that on the Wrong Side cluster rows, the beginning ch 2 does not count as a stitch—your first single crochet goes directly into the very first stitch at the base of the turning chain.
Why Alternating Single Crochets & 3-Dc Clusters Creates Zero-Curl Texture
Many chunky bobble or puff-stitch scarves suffer from stiff fabric or curling edges. By pairing each 3-double-crochet cluster (Cl) with a low-profile single crochet (sc) immediately next to it, and then working a solid row of single crochet on the Right Side return pass, the fabric locks each cluster into place:
- Row 2 (Wrong Side – Cluster Formation): Because you work your
Clon the Wrong Side, the तीन double crochet posts naturally push outward toward the Right Side (RS) when compressed by the adjacent single crochet stitches. - Row 3 (Right Side – Structural Stabilizer): Working 1 single crochet evenly into every stitch across the Right Side anchors the tops of the clusters and keeps both long side edges completely flat without requiring a separate border.
- Easy Stitch Multiple: To customize the width of your scarf, chain any even number of chains. Working your first single crochet into the 2nd chain from the hook yields an odd number of stitches (a multiple of 2 + 1).
Materials, Yarn Options & 5-Size Scarf Customization Matrix
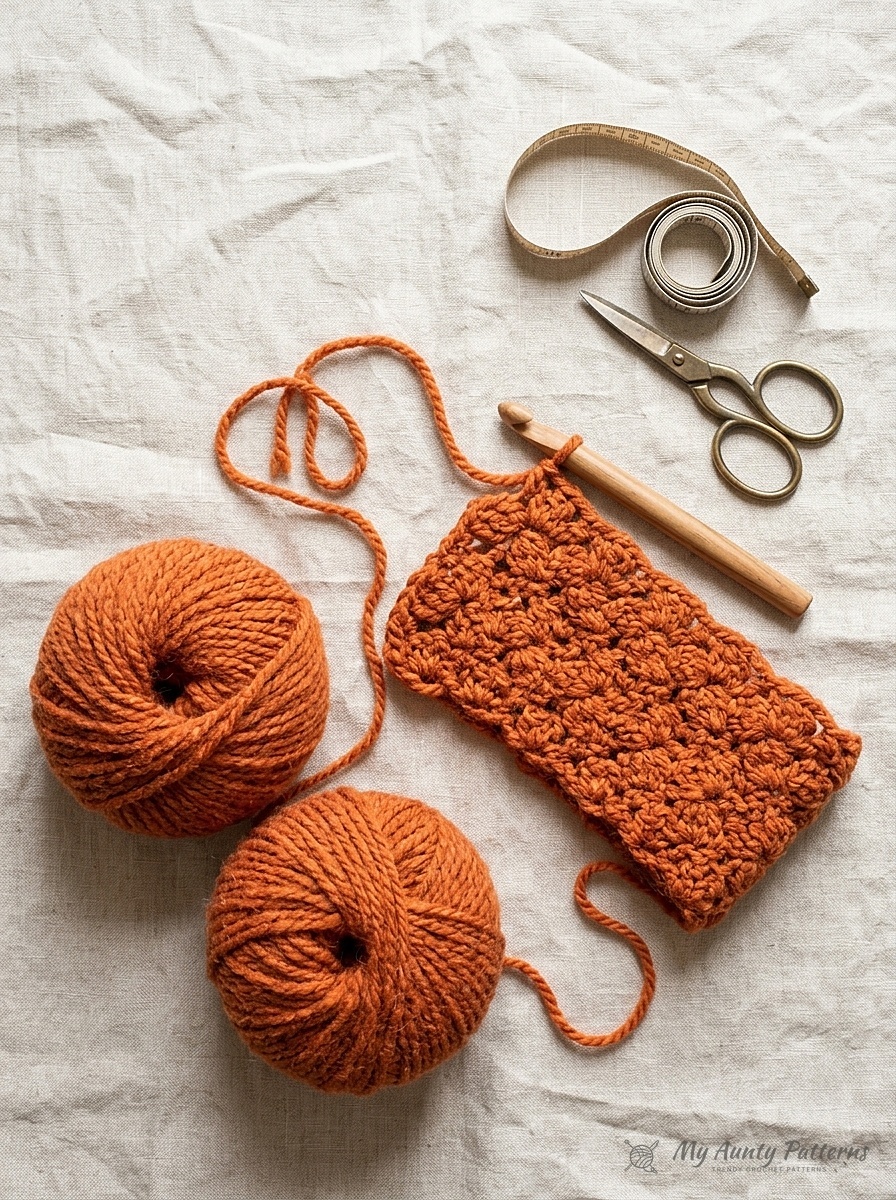
The featured sample is crocheted in Bernat Wool-Up Bulky (Category #6 Super Bulky, 80% acrylic / 20% wool; 5.3 oz / 150 g, 127 yds / 116 m per ball) in colorway Pumpkin (57014) using a U.S. Size M/13 (9.0 mm) crochet hook. You can also work the exact same pattern in 100% acrylic Bernat Softee Chunky (3.5 oz / 100 g, 108 yds / 99 m per ball — 3 balls required).
Materials & Tools Checklist
- Yarn Option A (Wool Blend): Bernat Wool-Up Bulky (5.3 oz / 150 g; 127 yds / 116 m) in Pumpkin (57014) — 2 balls (approx. 245 yards total including fringe).
- Yarn Option B (100% Acrylic): Bernat Softee Chunky (3.5 oz / 100 g; 108 yds / 99 m) — 3 balls.
- Crochet Hook: Size U.S. M/13 (9.0 mm) crochet hook, or size needed to obtain gauge.
- Notions: Large-eye blunt yarn needle, stiff 10-inch book or cardboard template for cutting uniform fringe strands, and sharp fabric scissors.
- Official Pattern Gauge: 8 stitches and 8 rows = 4 inches (10 cm) in the established 2-row Cluster Texture Pattern.
Swipe left or right on mobile to view all 5 scarf size options.
| Scarf Style | Finished Dimensions (Excl. Fringe) | Foundation Chain (Even Number) | Row 1 Stitch Count (Clusters per Row 2) | Approx. Rows | Super Bulky Yardage |
|---|---|---|---|---|---|
| Child / Youth Winter Scarf | 5.5 × 46 in. (14 × 117 cm) | Chain 12 | 11 sts (5 clusters) | 92 rows | 135 yds (2 balls) |
| Keyhole / Coat Ascot Wrap | 6.5 × 52 in. (16.5 × 132 cm) | Chain 14 | 13 sts (6 clusters) | 104 rows | 175 yds (2 balls) |
| Classic Everyday Scarf (Sample) | 7 × 64 in. (18 × 162.5 cm) | Chain 16 | 15 sts (7 clusters) | 127 rows | 245 yds (2 balls / 300g) |
| Extra-Long Double-Wrap Scarf | 8 × 76 in. (20.5 × 193 cm) | Chain 18 | 17 sts (8 clusters) | 152 rows | 335 yds (3 balls) |
| Oversized Blanket Shawl Scarf | 11 × 80 in. (28 × 203 cm) | Chain 24 | 23 sts (11 clusters) | 160 rows | 480 yds (4 balls) |
US Stitch Abbreviations & Cluster Stitch Definition
- Approx = Approximately
- Ch = Chain(s)
- Cl (3-Double-Crochet Cluster) = (Yarn over hook and draw up a loop in next stitch, yarn over and draw through 2 loops on hook) 3 times all in the same stitch (4 loops now on hook); yarn over and draw through all 4 loops on hook.
- Rep = Repeat
- RS / WS = Right Side / Wrong Side
- Sc = Single crochet
- St(s) = Stitch(es)
- Yoh = Yarn over hook
Row-by-Row Cluster Scarf & Knotted Fringe Instructions
Before crocheting the body of your scarf, measure and cut the fringe strands first and set them aside so you never run short of yarn on your final rows!
Stage 1: Pre-Cutting the Fringe & Crocheting the Scarf Body
Pre-Cut Fringe Strands: For the classic 15-stitch scarf with 8 fringe bundles along each end (16 bundles total, using 3 strands per bundle), cut 48 strands of yarn each measuring 10 inches (25.5 cm) long. Set these 48 strands aside until Stage 2.
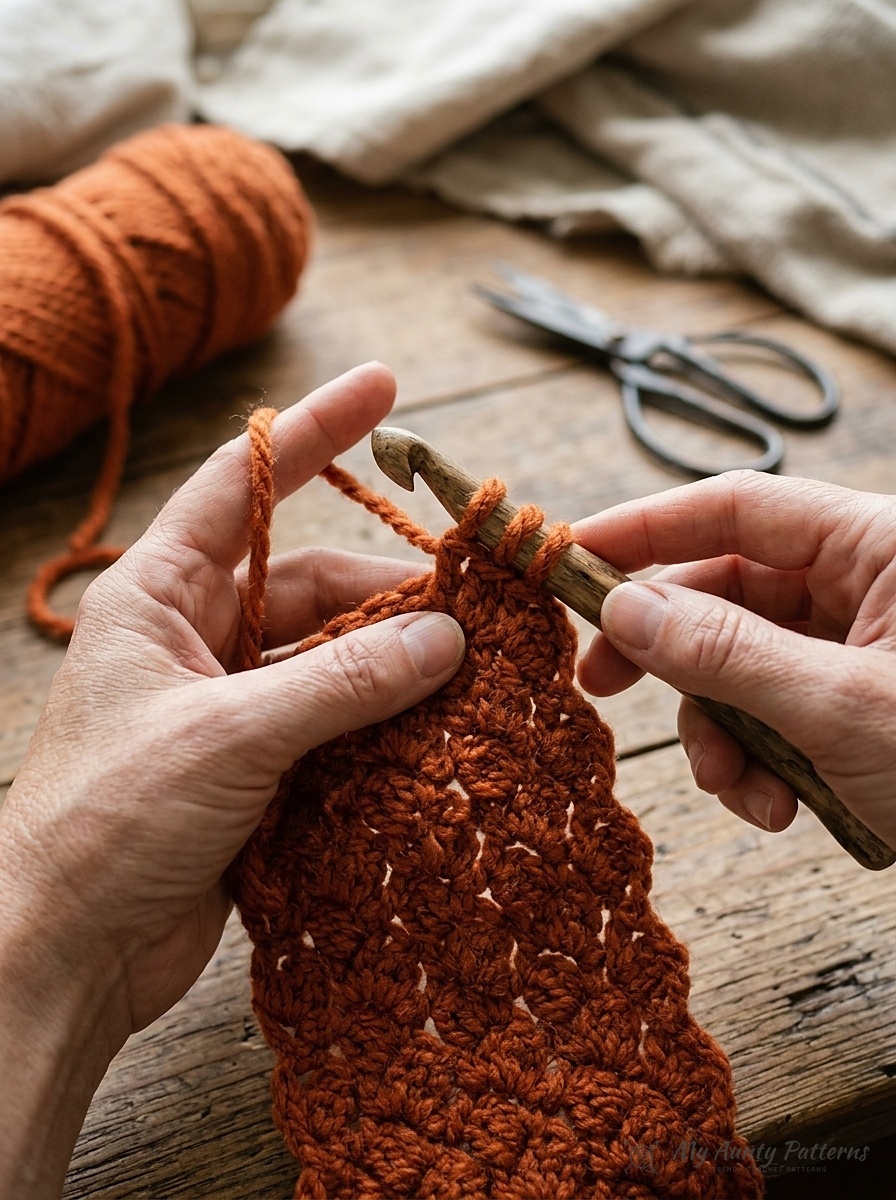
Foundation: With U.S. M/13 (9.0 mm) crochet hook, chain 16 loosely.
Row 1 (Right Side): Work 1 sc in the 2nd chain from hook. Work 1 sc in each remaining chain across to the end of the foundation chain. Turn work. (15 sc stitches).
Row 2 (Wrong Side – Cluster Row): Chain 2 (does not count as a stitch). Work 1 sc in the very first stitch. *Work Cl (3-dc cluster) in next stitch, then work 1 sc in next stitch. Repeat from * across to the end of the row, ending with 1 sc in the last stitch. Turn work. (15 stitches total: 8 sc and 7 clusters).
Row 3 (Right Side – Stabilizer Row): Chain 1. Work 1 sc in each stitch across (working into the top of every sc and the top loop of every Cl). Turn work. (15 sc stitches).
Rows 4–127 (Main Scarf Length): Repeat Row 2 and Row 3 for the Texture Pattern until the work from the beginning measures approximately 64 inches (162.5 cm) or until your remaining yarn is just enough for one final row, ending on a Row 3 (Right Side) repeat. Fasten off and weave in body ends.
Stage 2: Attaching the 3-Strand Knotted Fringe
Step 1: Hold 3 cut 10-inch strands of yarn together and fold them in half to form a loop.
Step 2: With the Right Side of the scarf facing up, insert your 9.0 mm crochet hook from back to front through the first stitch at the corner of the foundation edge. Catch the folded loop and draw it partway through toward the front.
Step 3: Pass all 6 cut ends through the loop and pull snugly to form a lark’s-head fringe knot. Repeat in every second stitch across both the top and bottom short ends of the scarf (8 lush fringe tassels per end). Trim the fringe ends evenly with sharp scissors.
Mary’s Studio Tips for Defined Clusters
- Tighten the Single Crochet Immediately After Each Cluster: When you work the single crochet into the stitch right after a
Cl, give your working yarn a gentle tug before completing the single crochet. That slight tension difference forces the tall 3-dc cluster to pop out dramatically on the Right Side. - Don’t Work Into the Ch-2 Turning Chain on Row 3: Because the
ch 2at the start of Row 2 only lifts the yarn to cluster height and does not count as a stitch, make sure your 15th single crochet on Row 3 goes into the first single crochet of Row 2—never into the turning chain. Counting 15 stitches every few rows keeps your edges laser-straight. - Steam-Block Fringe Ends Lightly: If your yarn strands have a slight curl from the skein, hover a garment steamer 3 inches above the knotted fringe and comb through with your fingers for sleek, boutique-style tassels.
Care & Washing Instructions
- Gentle Cold Wash: Hand wash in cool water (or machine wash cold inside a mesh garment bag if using 100% acrylic Softee Chunky) so the fringe tassels do not tangle around the agitator.
- Dry Flat: Lay flat on a clean towel and smooth the fringe strands parallel while damp.
Frequently Asked Questions
Why do my clusters pop out on the back of the row I’m working on?
That is completely normal and intentional! Row 2 is a Wrong Side (WS) row. When you work a 3-dc cluster followed by a short single crochet, the cluster naturally domes toward the side facing away from you—which is the Right Side (RS) of the scarf.
Can I turn this pattern into an infinity cowl?
Absolutely! Simply omit the pre-cut fringe, crochet the scarf until it measures 56 to 60 inches long, end after a Row 2 (Wrong Side) cluster row, and whipstitch the final row to the foundation edge with Right Sides together so the seam blends invisibly into the pattern repeat.
READER COMMENTS & PATTERN QUESTIONS
Have a question about stitch counts, yarn substitutions, or sizing? Leave a comment below — Mary Ward reads and replies to every maker question!